Configure data to Destiny sites: Google Workspace
To configure your Google Workspace account, first you must log in to the Follett Mobile Device Management (MDM) user interface.
|
Note: If you have never logged in to your account via the Destiny Resource Manager MDM Integration feature, first you need to configure Google Workspace connectivity. |
To access the Destiny Resource Manager MDM integration homepage:
- Log in as a Destiny Administrator.
- Select Setup > Sites sub tab.
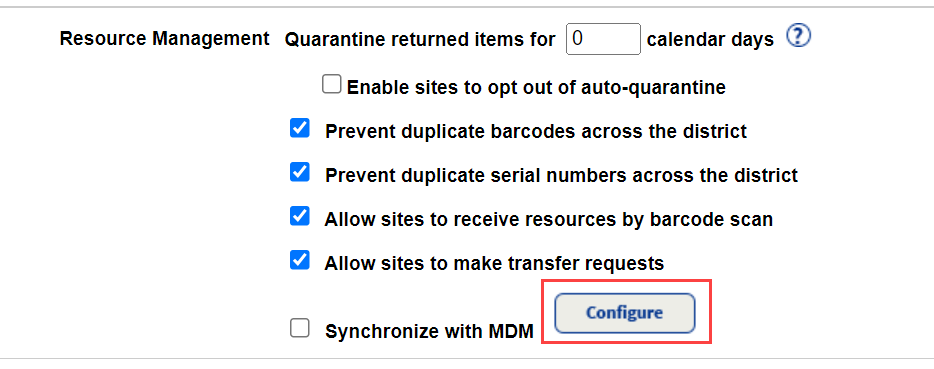
- Next to the district name, click the Edit icon,
 . The Edit District page appears.
 - Under Resource Management, click Configure.
The Mobile Device Management integration homepage appears.
- At the top-right of the Mobile Device Management homepage, use the Account Setup drop-down to select your MDM.
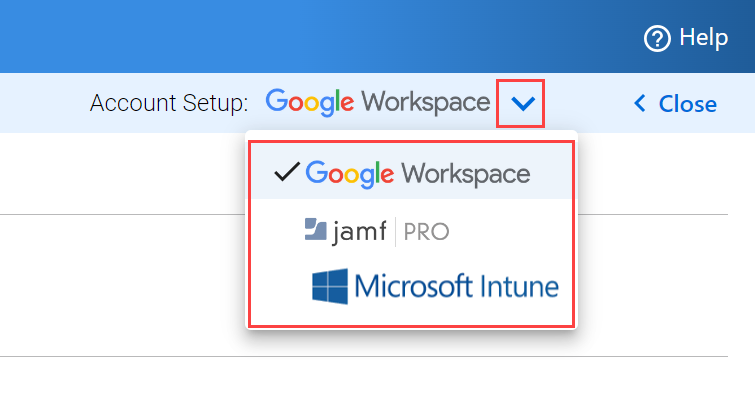
Note: Destiny will remember your MDM selection.
To define the flow of data from Google Workspace organizational units to Destiny Resource Manager sites:
- Click Configure Selected Account to Destiny Sites. The Select Data to be Synced page opens.
-
Under Organizational Units, click
 to expand the list of Organizational Units.
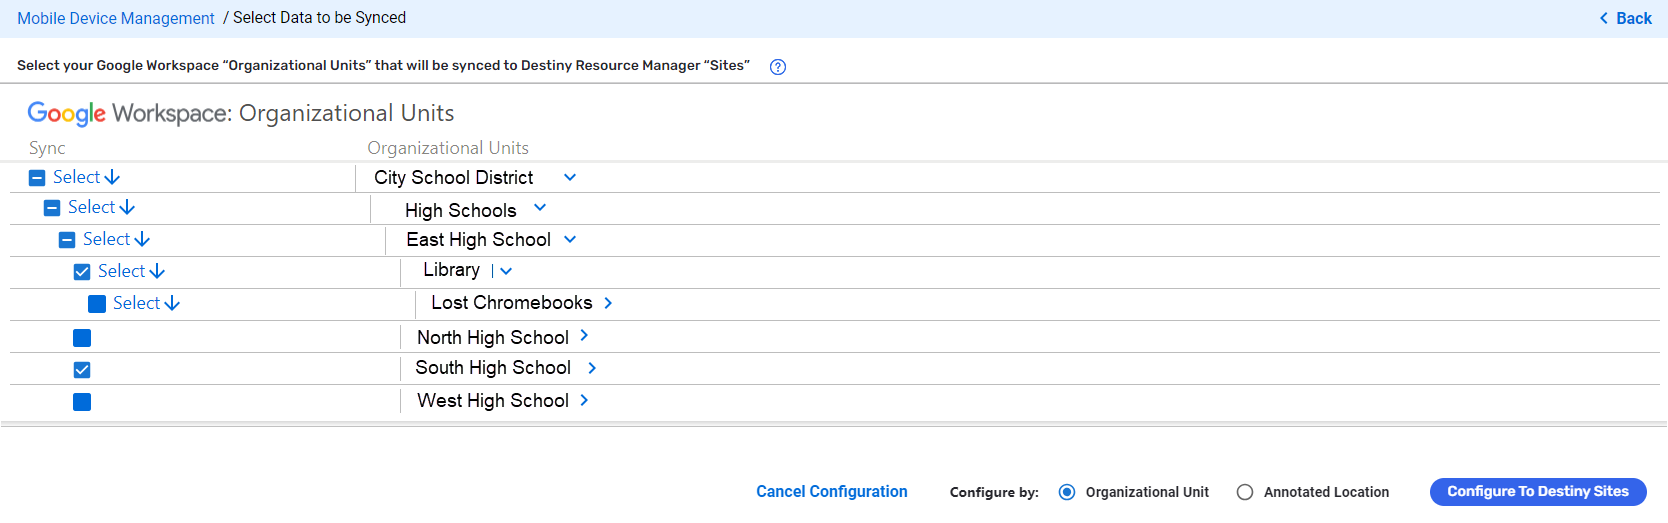
- Under Sync, click Select or Deselect in the row of each Organizational Unit.
- At the bottom of the page, use Configure by: to specify which field the synchronization matches on: Organizational Unit or Annotated Location.
- Click Configure To Destiny Sites. The Mobile Device Management/Configure Data Relationships page appears.
- If you selected Organizational Unit in step 4, under Sites, click the locations you want to select.
If you selected Annotated Location in step 4, under Field Values, type a Google Workspace annotated location ID value. - Click Set Configuration.